Quasi quis ea est n

Execute AWS Lambda locally in Pycharm and Deploy to AWS 12

qwertyu


Odit deserunt repreh

Well, as a software developer we generally prefer to use the tool of our own choice while coding. The priority varies from developer to developer. Some directly starts with the terminal while others do with the IDEs. The Development is required everywhere and the earnestness of Serverless technology can’t be ignored where also development plays a crucial role. One among them is AWS Lambda, It’s fun automating the stuff using Lambda but it becomes challenging when we need to do it online via the AWS console. In order to get rid of that muddle, let’s frame-up the environment where we get the same feel without compromising our interest, i.e. Coding from our favourite IDEs on the local computer.

This recipe will provide a modus operandi to set up and manage the configurations of PyCharm in a local development environment, and how you can go ahead and deploy your first Python serverless function directly to AWS Lambda. Believe me, it's fun!!

I am using macOS Catalina. The setup is going to remain indistinguishable in almost all the macOS. However, the instructions to do the same in all other OS is also mentioned.

Here are the steps to setup PyCharm locally:

1. In order to achieve our target, there are certain application pre-requisites.

  1. Ensure that Python is installed in your system. If not, click here to download the Python version of your choice. (Preferably Python 3.X)
  2. Check if everything is in order using the below command from the terminal.
python --version# Python 3.7.3.

2. Install the AWS Serverless Application Model (SAM) command-line interface using brew. (Windows Users can try this).

Before Installing Brew there are few prerequisites. To complete that click here

After the successful installation of Brew checks the version.

Note: Brew (It is not required in Windows or Linux OS)

brew --version

The output should look like this:

Homebrew 2.1.6Homebrew/homebrew-core (git revision ef21; last commit 2019-06-19)

Let’s install SAM CLI now.

brew tap aws/tapbrew install aws-sam-cli

To upgrade the AWS SAM CLI, you still use Homebrew, but replace install with upgrade as follows:

brew upgrade aws-sam-cli

3. In order to run the Lambda function locally, we will be needing a docker container. Let us install docker .

brew cask install dockeropen /Applications/Docker.app

Windows and Linux based user can follow this link to get docker installed in their system.

As soon as docker has been launched, check if it is running:

docker ps

4. Once done with the above steps, let’s install the IDE of our choice. Here in this case Pycharm. (You can make use of another tool like Visual Studios as well).

Follow this link to install Pycharm. You may install the package as per the requirement. Here we are installing the community edition.

5. Let us start the installation of a toolkit and set up the project structure.

Steps: Navigate to Pycharm preferences > Plugins > Marketplace > Search Plugin in marketplace > Search for AWS Toolkit and Install it.

Note: The way to install a plugin in windows and Linux may be different. You may click here to get it done in your system.

  • Once done, restart Pycharm to get the plugin into action.

6. Setup the Project in Pycharm.

Let’s set up your project in PyCharm. Create a new project from File > Create new project and choose AWS Serverless Application as project type. Be sure to select the correct setting (you can choose a “Hello World” template from SAM Template).

The project setup will be done automatically, and a function called lambda_handler, which returns a basic ,Hello World“ example, will be created in app.py.

7. The directory structure will be like this:

Note that, there are two files of major concern in our case right now. i). app.py ii). template.yaml

Click on app.py file and write some sample lambda function. You may simply copy paste this as well or take the default created.

import jsondef lambda_handler(event, context):return {"statusCode": 200,"body": json.dumps({"message": "hello world",}),}

8. Now ensure that you have your Correct AWS credentials configured in your system.

To install AWS CLI in Mac — Click here Windows — Click here Linux — Click here

Once, installed, configure using the credentials, generated using IAM Service. To configure AWS CLI click here.

9. Configure Pycharm to connect to your AWS account. Click on AWS Connection and Select the credentials along with the region.

Selecting AWS credentials

10. Once done, Select the JSON Input to trigger the lambda function. You may select Hello World Template or can write your own input file.

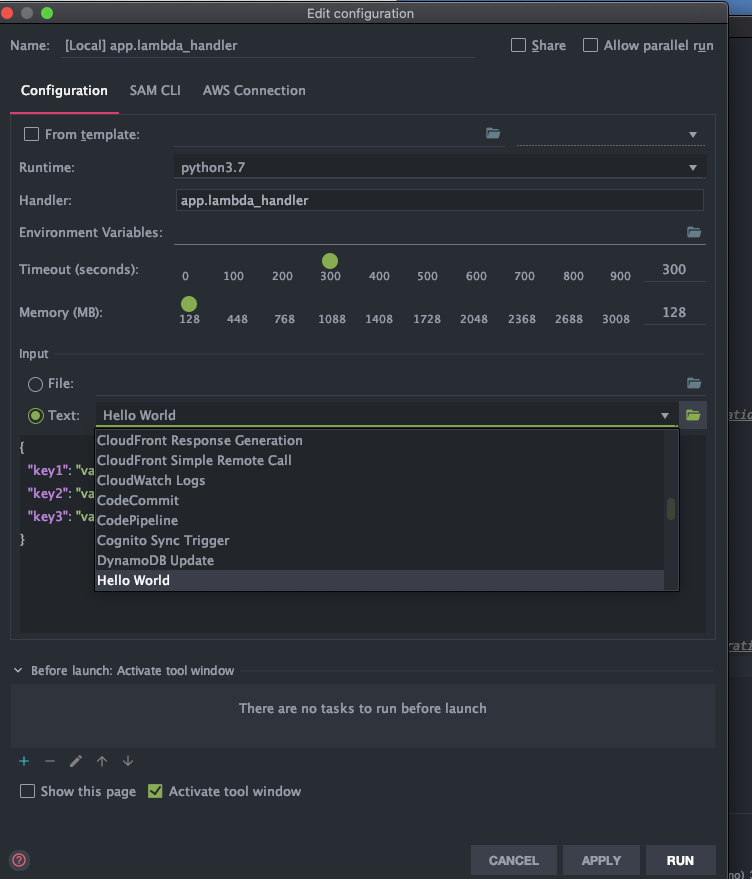
Selecting the Input Json for Lambda Function
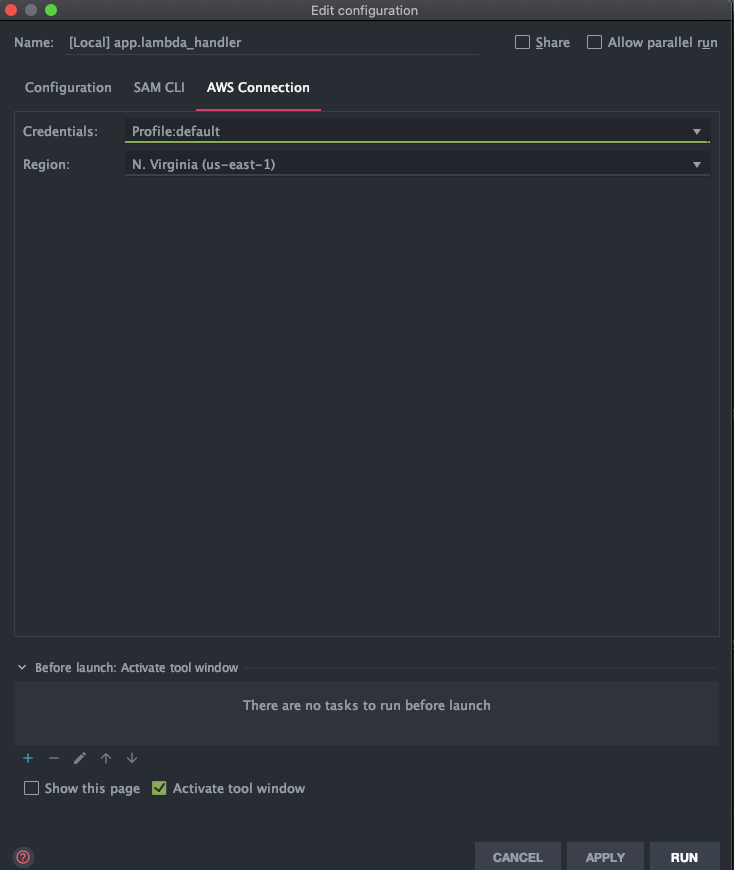
11. Test the function locally now!! Simply go to your function and click on Run.

Run Lambda Locally

Now it will take a while, as it will download the Docker Container for the first time. Once done, something like this will appear!

Output after execution

12. You’ll need to create an AWS CloudFormation stack and Amazon S3 Bucket (if needed) in order to proceed with the deployment.

In order to deploy your function to AWS Lambda, you can right-click on your project folder in the sidebar, and choose Deploy Serverless Application:

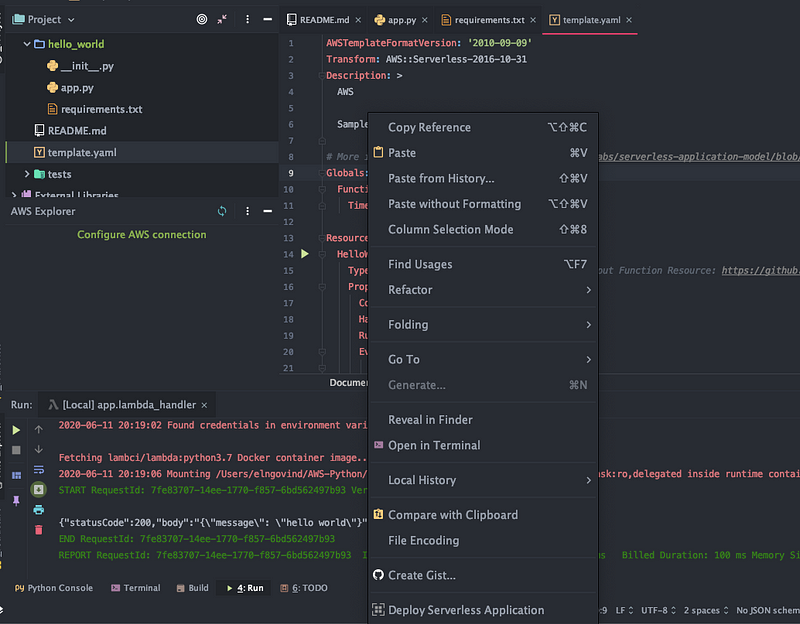
The deployment will go live in a short while!

Give some name for the Cloudformation Stack and Select the S3 Bucket.
Now, you’ve successfully set up PyCharm with AWS toolkit to test your functions locally, subsequently deploy it live to AWS Lambda (via AWS CloudFormation).

Note: Feel free to reach us via a comment in case of any issue, we will solve it together.

Conclusion

Ut proident quibusd

Share post on

subscription

Subscribe to Our Blogs

Subscribe to our blogs and be the first to know about innovations in the field of cloud storage

Related Posts

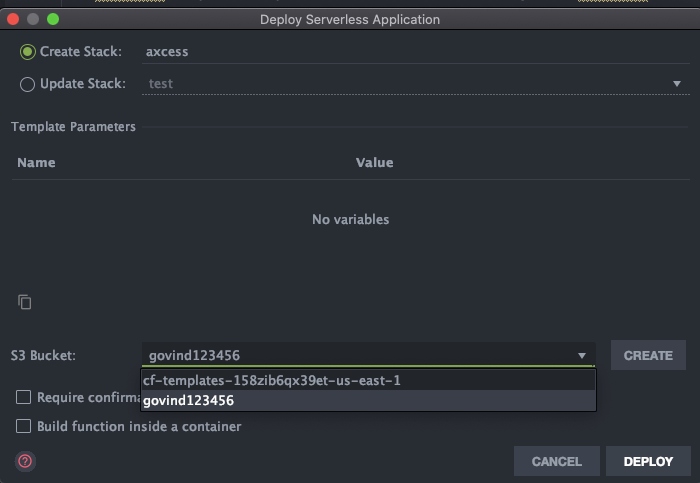
Transform Legacy Application using Amazon Q Developer (Transform)
The Shift Towards Assisted CodingThe world of software development is rapidly evolving, with developers increasingly relying on AI-powered tools to streamline workflows, reduce manual effort, and accelerate project delivery. Assisted coding tools are becoming indispensable in modern software engineering, enabling teams to tackle complex challenges with greater efficiency and precision.In this era of digital transformation, legacy systems—particularly those built on older frameworks like ASP.NET—pose significant challenges. Modernizing these systems requires not only technical expertise but also innovative tools that can simplify the process. Enter Amazon Q, AWS’s Generative AI-powered conversational assistant, which is designed not only to build cloud native AWS applications but is also proving to be a game-changer in the modernization of legacy Windows workloads.Strengths of Amazon Q in ModernizationAmazon Q stands out as a powerful tool for modernizing legacy systems, thanks to its ability to provide actionable insights, automate repetitive tasks, and guide developers through complex technical challenges. Its strengths lie in:Intelligent Recommendations: Offering tailored suggestions for containerization, dependency management, and deployment strategies.Seamless Integration: Working effortlessly with AWS services like EKS, making it an ideal choice for cloud migrations.Contextual Understanding: Interpreting legacy codebases and providing solutions that align with the existing architecture.These capabilities make Amazon Q an invaluable partner for teams looking to modernize legacy workloads without compromising on stability or performance.Case Study: Modernizing Legacy ASP.NET Applications with Amazon QIn a recent project, we partnered with a leading financial services provider to modernize their legacy ASP.NET applications by containerizing and migrating them to AWS Elastic Kubernetes Service (EKS). Amazon Q played a pivotal role in overcoming the challenges associated with this transformation. Here are three key highlights of how Amazon Q contributed to the project’s success:Simplifying Containerization of Legacy ASP.NET ApplicationsLegacy ASP.NET applications, built on the .NET Framework, are not inherently designed for containerization. Amazon Q provided step-by-step guidance on how to containerize these applications effectively. As a first but vital step, it recommended using a Windows container image as the base image and ensured compatibility with Internet Information Services (IIS), a critical component of the legacy applications. By automating much of the containerization process, Amazon Q significantly reduced the time and effort required to prepare the applications for migration. Resolving Complex Dependency ChallengesOne of the major hurdles in the project was managing dependencies like the Oracle Client, which was essential for the application’s functionality. Amazon Q provided detailed instructions on: -Installing the Oracle Client within the container.-Handling scenarios where both 32-bit and 64-bit Oracle Client versions were required.-Configuring IIS to accommodate these dependencies seamlessly.This level of granular guidance ensured that the applications ran smoothly in the new containerized environment. Streamlining Build and Deployment PipelinesAmazon Q also played a crucial role in optimizing the build and deployment process. It helped the team determine whether the applications could be built using a standard pipeline or required additional steps. For applications lacking .csprojg and .sln files, Amazon Q suggested building them using Visual Studio, while the Dockerfile handled the publishing and deployment processes. This approach minimized manual intervention and ensured a smooth transition to AWS EKS.Final ThoughtsAmazon Q and Q Transform (Currently in Preview) has emerged as a go-to tool for modernizing legacy Windows workloads, as demonstrated by its pivotal role in the successful migration of legacy ASP.NET applications to AWS EKS. By simplifying containerization, resolving complex dependencies, and streamlining build pipelines, Amazon Q enabled us to deliver a robust and scalable solution.As organizations continue to embrace cloud technologies, tools like Amazon Q will play an increasingly critical role in bridging the gap between legacy systems and modern infrastructure.Key Takeaways:Amazon Q is a powerful ally for modernizing legacy Windows workloads.Its intelligent recommendations and contextual understanding simplify complex challenges.By leveraging Amazon Q, teams can accelerate modernization efforts while maintaining stability and performance.

Ready to discuss your cloud project?
Have questions?

Get In Touch

Only a competent AWS Consulting Partner will understand your unique needs and goals. The smart, enterprise-ready cloud solutions from Axcess.io can make life easier for your organization.


Services

    © 2025 All rights reserved

    Terms of Service|Privacy Policy